
Returning Window Shutters to the 1830 Farmhouse.
- artiozen
- Apr 22, 2020
- 5 min read

Updated: Dec 27, 2022
An older home suits window shutters and vice versa. Most go for the vinyl panels that are coach bolted to the wall and often are disproportionately small to the window area they are supposed to (suggest) covering. I always wanted to have fully working shutters and hardware to hold them open and closed on as many windows of the house as possible. What I didn't know is what kind of adventure achieving this seemingly simple goal would be. So the main house was built with 5 bays rather than 4 and with windows on 3 sides (making it very light and airy inside). This leads to a total of 28 full size windows - 14 on the first floor and 14 on the second floor. Most of these were original to the house in size and position. There is one window that was closed off when the attic staircase was added and probably the second story added to the adjoining building. The windows in the adjoining building are a little different in size and consistency. So its tempting to treat each group of windows slightly differently to emphasize the building order, age difference and extensions / modifications. Traditional shutters were of paneled design for the first floor to completely block the window for storm and light ingress, while the second floor windows (typically for bedrooms) would have louvered shutters which could be adjusted to let in more light and breeze. The windows in 1830 were 6 over 6 single glazed sashes - the sashes on our house are held up with latches that act on a saw-tooth ratcheting edge feature - which seems to precede counterweights and pulleys. It was the lower window that was typically hoisted upward for ventilation and indeed our upper windows are fixed in place. This is important to consider when selecting shutter designs. The latches to hold the shutter closed should be presented to the opening part of the window for activation from inside the house.
There are many shutter designs out there - 2 panel, 3 panel and 4 panel all seemingly interchanging in the same time period. The shutters I found for the first floor were two panel with a larger upper panel and smaller lower panel (this may have been the other way around on their previous installation) - thus the smaller panel and its divider present the shutter latches to the middle of the lower sash when up (open). So with basic window sizes in hand I hunted for larger lots of suitable shutters from salvage and antique yards to make up the houses replacement set. In this area a single shutter can sell for $20 to $60 each. So pairs and multiples are often broken up. I was lucky to find 4 pairs of a two panel design and then 18 pairs of a similar panel design which had complete shutter latches on them as well as acme side mount half hinges. The first set of paneled shutters also showed previous incarnations by having evidence of half moon cut outs in the small panel, which were then filled in again for a while with a crescent shaped wooden block - an indicator of how much craftsman care and work went into maintaining a shuttered house. I also found 5 pairs of louvered shutters for the front windows of the second floor - more louvered shutters have yet to be found.
It was shortly after these significant purchases that I released a couple more essential details of "working" shutters,,, The windows on stone houses are built with robust frames and the window sashes are inset to them - this allows the shutters to swing into the insets and fit flush to the trim - in a storm there would be no protruding edge to get pried open. However, the house now had a set of 1960's storm windows attached over the sashes - filling the inset, so now my new hinges would have to fold over these and not fit flush - this also meant that all hardware on the shutter face would need to be low enough profile to avoid hitting the storm window glass. The second learning was that all the window frames had the male pintels still present for the hinges and shutters to drop on and off, These pintels are robustly attached to the frame in the corners of the window opening - but the hinge would need to attache to the top and bottom bars only, Side hinges do not work on this kind of pintel - I quickly found that the standard 5" L hinges would work and look nice and were available in a series of "offsets" made form stainless steel with a black finish and were sold with and without pintel kits. The offset is also key... this allow the hinge pin to be positioned in a way that the shutter can swing from fully closed to fully open, while the hinge is surface mounted to a typically 5/ 4 " thick shutter construction. To get close I tried each offset available and practiced the mounting and open / closed positions. With the houses reduced window insets and 5/4 hinges with pintels so close to the window plane that the 1/2" offset hinges would work best.

Hanging the shutters on the hinges it was easy to produce a pleasing "open" position - but when they were swung in to close, the exact window opening size became critical. The house was always stuccoed - so the widows have a heavy trim rail around the window edges - the shutters would have to fit within this rail for height (above the window sill). So luckily all the shutters I have were a little over the 60" distance between the sill and upper trim. This became the target height for all the shutters on the saw bench. When the shutters are closed they are supposed to have an angled bottom edge that matches the drop in the window sill - this makes all rain drips occur on the outer surface and run away from the window - another saw bench adjustment - I used 10 degrees to match the sill.

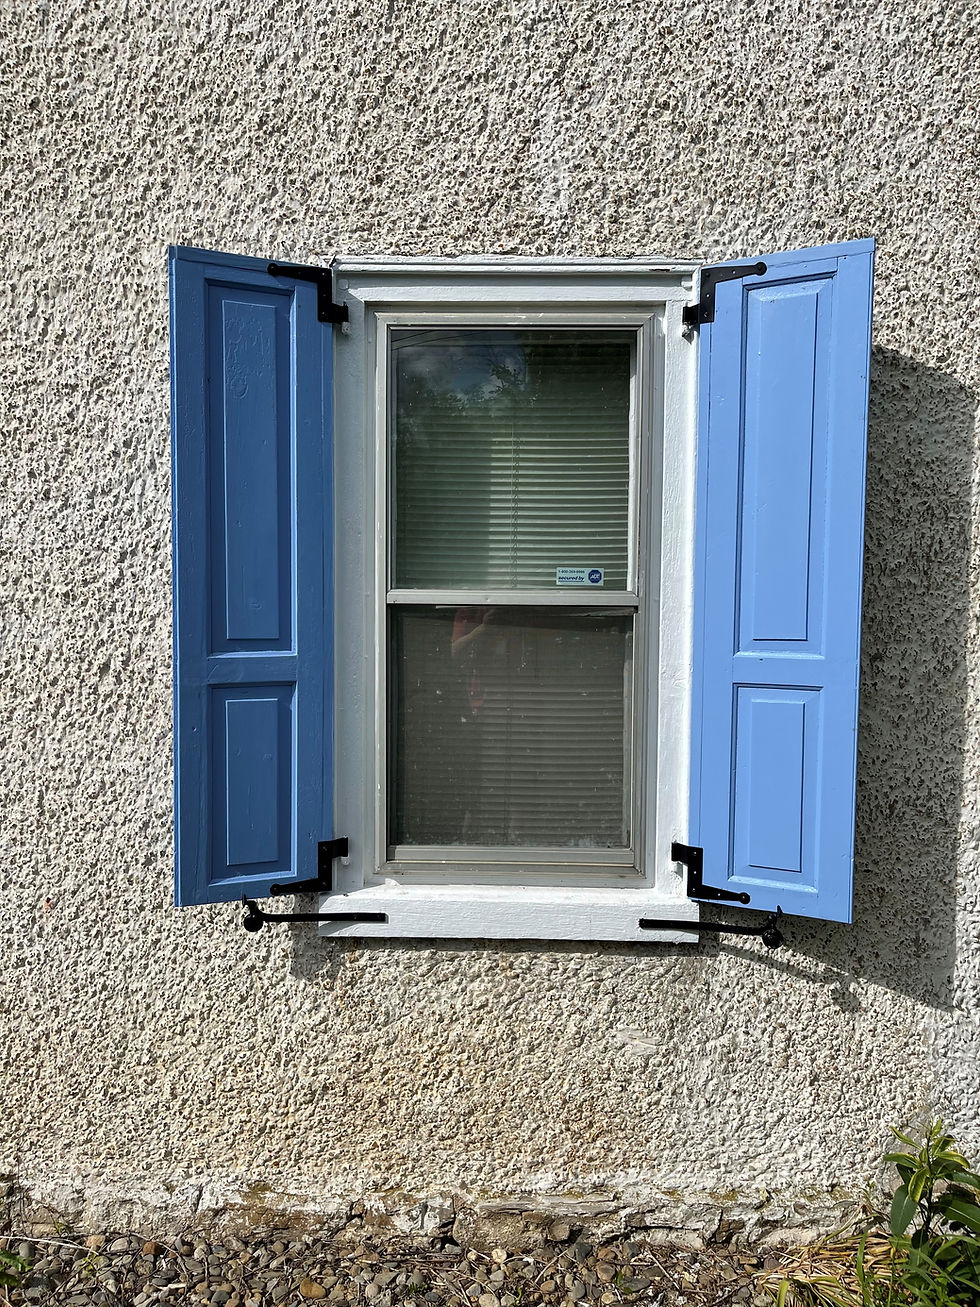
To determine the width of the shutters, I put the hinge pair on the pintels and swung them into the closed position. The target width of the shutter pair when racked together on their sealing edges is the same distance as between the hinge vertical edges when closed (see the photograph) - 31" giving a target of 15.5" width per shutter (plus closing edge allowances). Another run through the saw bench to split down the vertical staves - I took this chance to saw off the pockets made to inlet the previous incarnation of edge hinges. This width reduction also required cutting and packing the internal and external vertical staves to achieve the target widths and keep the stave width visually similar on each shutter.

So far each "rescue" shutter has required: 4 saw cuts, 1 width insert, sanding, painting, hanging, 2 hinge sets, blasted and painted latch sets and hold open rod hooks on top of their purchase price, before I start rot repairs.
Looking at commercial wooden hinge services, all 28 windows might have cost $20k to complete. I'm still hoping to complete them for a fraction of the price.


Comments